Saturday, October 25, 2014

How to Make Money Online with a Cooking Recipe Blog

This is a follow up article for the how do I start a blog and make money online series that we have been publishing on this site to help users get started and create a successful blog.
This article is for those that like to “play” in the kitchen, for people that enjoy preparing meals and testing and trying new ingredients. There is a way to make money online with a recipe or food blog, and in this post I will provide a somewhat detailed overview of that process along with some relevant tips and tricks.
creating a cooking recipe blog

Documenting the process

First, you might want to commit to coming up with a recipe each day. You have to prepare meals every day anyway right? Fast food, delivery, and take out is primarily unhealthy and expensive. People want to learn ways to eat at home cheaply, conveniently and healthfully. Your “job” could be to share your approach. It could be fun and rewarding.
Perhaps you have a speciality that you can create a weekly recipe for, such as a flavored hummus recipe.
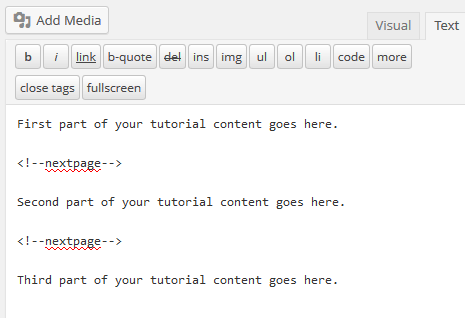
Now, it’s important to jot down the steps and the measurements for the recipes. For the enthusiastic, filming and taking photos of the process will bring you steps head of anyone else attempting the same.

Starting a recipe blog

The simplest approach is to get a domain name, somecheap shared hosting (both can be purchased from HostGator), and to install WordPress (which is free).
Then, your best bet would be to purchase a premium WordPress theme that leverages “Recipe semantic markup.”
To keep this article succint-ish, I will just say that recipe markup will enhance your recipes within search engine results, bringing in more traffic to your web site.

Monetizing your recipe web site

Now for the making money part. There are numerous ways that the web site can generate a revenue. I will go through the main ways here.
For each recipe that you publish you should link the ingredients, and equipment used, to their own pages on your site.
For example, create a separate page for a blender which reviews the blender that you use. Also, for each, or most of the ingredients, having their own page which details their health benefits, origins, or other interesting information is beneficial for the sites visitors.
Then from each of those pages you can (and should) run a geo targeting script that determines the country of the visitor. Then you could link the visitor to the appropriate Amazon web site for their country: Amazon.com, Amazon.ca, Amazon.co.uk, etc.
And, if you become an associate (or affiliate) for those Amazon sites, you get commissions for any purchases made.

Why use Amazon?

Amazon is a widely known, widely trusted online store that sells a wide range of products. Also, when linking to Amazon with an “affiliate link,” which is simply a link accredited to you so that you get commissions on sales, you will also be rewarded when Amazon up-sells to the customer.
Since there is a wide range of products available on Amazon, and Amazon offers free shipping on purchases over a certain amount, customers often fill their baskets with other items, items that you will get commissions on as well if you reffered the customer to the site to begin with.
Amazon has a lot of upsell methods in place including the “customers who bought this, also bought…” followed by a list of other related items.
Sure, the commission percentage isn’t as high as when promoting digital items as an affiliate, but the high trust factor and the commissions awarded for extra products make it worth the efforts.
Commissions for small appliances, like juicers and blenders, can generate amounts between $10 and $30 or more which isn’t bad at all.

Taking it all even further

Besides doing the above, you can really knock this money making idea out of the park by performing some of the following tasks:
1) Social photo sharing: Including your original photos on social photo sharing sites like Flickr and Pinterest can bring traffic from different sources. Embed the photos from those sites into yours to increase page load times and reduce bandwidth usage.
2) Social video sharing: In the same way as with photos, creating unique videos and posting them to social video sites like YouTube can increase exposure and bring more traffic. Also, embedding videos into recipe pages increases the value of the page from both visitors and search engines perspectives.
3) Recipe book creation: You could benefit immensely by adding your recipes to a stand-alone document as you go along.
If you have the time and gumption, it would be valuable to include each recipe into its own document, including links, and exporting it as a PDF file.
You can do this using free tools. OpenOffice.org Writer lets you create PDFs and retain hyperlinks. Most “free” software will not let you keep hyperlinks in tact in the exported PDF unless you pay for an upgrade, but OpenOffice does.
Each of these single-recipe booklets I would share on PDF sharing sites like Scribd and SlideShare.
Also, I would add related recipes to a larger PDF book. Then, you could either sell the book after ‘x’ amount of recipes are included, or “bribe” people with it to get them on your mailing list, or simply share it like you did the single-recipe booklets.
Then, of course, create a booklet with all of your recipes, and either share it, give it away to subscribers, or sell it. You could post it on Clickbank for example and let other people sell it for you and give them commissions for doing so.
4) Enhance recipe posts: Besides embedding multimedia into the posts (your unique photos from Flickr or Pinterest, and unique videos from YouTube) you can also do a write up for each post.
Rather than just including: Equipment list, ingredient list and procedure, also write something about the recipe. It could be anything including: the nutritional value of the main ingredients, reviews from family members on the taste, your motivation for creating the recipe, a vivid description of the taste, smell and texture, and how it feels in your mouth, and so on.
Just focus on creating unique valuable content always. By content I mean: the recipe itself (cite the inspiration if relevant), the written content, and the multimedia content.

Other ways to make money on a recipe blog

Besides sending customers through the Amazon sales funnel and getting commissions, and possibly selling your recipe books (either in digital, print, or both), you may want to consider other avenues for generating income.
You can consider selling advertising space with services like AdSense (for contextual and retargeting ads), or BuySellAds and BuyAds (for banner and Twitter advertising), or even independently.
Also, touched upon above was building a list and offering a recipe book as an incentive to join the list. Then you could send out a newsletter, which could simply be a collection of the recipe postings from the previous week to bring readers and customers back to the site.
You could also make announcements of new books, new products, or events that you have a connection with (either hosting yourself, selling yourself, or that you are an affiliate for).

Crowd recipe publishing

At some stage, even very early, you may want to open the doors to let others share their recipes on the site. This could keep you from having to publish every day, but also expand the audience.
Additionally, if your site is on a specific theme (discussed below) you might want to turn on WordPress MultiSite and let others blog about other aspects of that theme.
As an example, if your recipe site caters to recipes that are “autism” (i.e dairy and casein free) or “diabetes” (i.e. low sugar) friendly, a new blog, or family diary blog, on any of those topics can further expand the site.

Cater to a particular pocket of people

With web sites, it is often best (perhaps always best) to not try to cater to everyone. You can devote a recipe site to a specific audience and only create recipes that they would find interesting.
If you follow a particular lifestyle, like vegan or raw foods, it is that much easier. Simply, documenting what you do daily is the easiest approach.
To brainstorm ideas for a “pocket of people” here is a quick process to run through, with an example. This process can help you come up with a domain name, a tag line and the overall theme for the recipe or health site.
Tip 1) Visit Google and type in a phrase and watch what comes up from Google Suggest. For example: I began typing “what can I eat on…” (without the dots) and many things came up including:

what can i eat on the caveman diet
what can i eat on a low carb diet
what can i eat on the daniel fast

Another example: Starting with “recipes for…” came up with:

recipes for those with acid reflux
recipes for those with gerd
recipes for those with high cholesterol
recipes for people with high cholesterol and diabetes

These are examples of what people are searching for within Google. This represents a pocket of people that you can easily cater to and rank high for in the search engines to get traffic – traffic that can become customers.
Your site can quickly become the “go to” authority site in one of these niches because of low competition. In general, large food and recipe sites will have a page or category catering to these niches and that’s fine. But developing a site devoted to them will stand out in the search results.
You might have heard it already, but “there is money in the long tail”. Think about how many people are in the world!
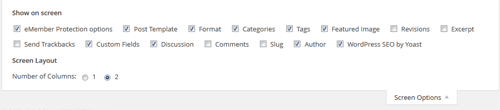
Tip 2) Picking one of those phrases can become the “tag line” for the site. In WordPress, to edit the tag line, you will go to Settings > General.
Now, from there you can create a nice 2-word punchy domain name that represents the site. You may or may not want to include the word recipes, it really depends on your future goals. The days of exact-match domains are gone, so don’t worry about matching a keyword for the domain. Create a brand instead, something that will be easy to remember, and be simple to build a logo around at some point.
Let’s say we went with the first result “what can i eat on the caveman diet” for the tagline, here are some ideas for domains:

CavemanEats
FoodOfCavemen
GruntDiet
...and so on

There you have it. You have a domain name, a tag line and theme for your recipe site. Now, adding content on a regular consistent basis is key. It could be recipes all the time, or a mix of recipes and stories and other related content.
Perhaps the categories can be: Recipes, News, Diary
Even if you are not an authority on the topic (yet), and perhaps you are just in the process of learning about say “foods that I can eat having crohns,” you can document what you learn/do as you go, building out an authority site, and making money in the process.
Who knows, your healing story can save a person’s life, and make you money at the same time. That’s not greed, that is leverage my friend

Adding Images to Your WordPress Blog or Website

A picture is worth more than 1,000 words when presented within a blog post (or page). On the web, an image could break up text, which can part the sea of text making it all more readable. An image can also help illustrate a point, and provide SEO value.
An image could find its way into image search results on a search engine. It can also, with the inclusion of keywords in its meta tags, potentially help a post rank for more keywords. Not only that, the image can be auto-thumbnailed in search results and show up when shared in Facebook or other social sites.
A search engine result with an image will attract the eye more so than one without, in most cases.

Adding Images to WP Posts the Old School Way

I’m from the old school. When I add an image I, more often than not, edit the image to be the exact dimensions that I want to work with. I use free tools like Gimp. You can use Photoshop too (if you have it).
I then, using good old fashioned FTP, upload the image to the trusty “images” folder off the root.
I then hand code the image tag in “Text” view of my WordPress post/page edit screens.
The code might look like this:
<img style="float: right; margin: 0 0 5px 10px;" title="pictre of a bat" src="http://example.com/images/pic.jpg" alt="picture of a bat" width="187" height="94" border="0" />

Let’s break it down shall we:

src: this represents the path to the image. I always use the full domain here so the image shows proper in RSS feeds, etc. In only one case when working for someone else they asked that I use only /images/pic.jpg without the domain in case they link-spam the domain with their SEO and need to switch domains. Doing it this way would save them the extra work later. Doing things ethically would prevent this from being a concern, but I digress.
width/height: the dimensions to the image, I always make sure they are the “real” dimensions, not just ones to force the size of the image.
alt: this is meant to be a textual representation for the image for the visually impaired, bandwidth savers, text browser users, and search engines.
title: usually, depending on the web browser, this phrase will be shown when hovering over the image. It is supposed to provide SEO value too but I think it is overkill and overoptimization personally, so I usually leave it out.
border: out of habit I always include this, which is a value in pixels that determines the size of the border around the image. It used to be that, when linking an image, if you didn’t explicitly tell all browsers NOT to include a border, then it would add a bad looking blue border. So, I got in the habit of using it. I use CSS for borders when I really want them, so I guess I’m notthat old school.
style: it’s probably not best practice to include styles in this manner. It’s a bad habit I picked up. It is preferred to include styles within CSS sheets, and make reference to the style with a class name (or ID). WP does this elegantly when using the automated tools for including images which I will cover shortly.
The particular style I used in the above example pushes the image to the right and wraps text around it to the left. I specified that I do not want a margin at the top or right side (represented by the first two numbers), but that I wanted 5px on the bottom and 10px on the left to create some white space around the image so that it doesn’t touch the text. Why different amounts? I haven’t measured but it seems that there is always 5px below the image with margin space for some reason, so I just add 5 more and it always looks pretty even.

Image Sources

You have to be careful when using images on your site or blog. If they are either copyrighted or assumed copyrighted it is best to either a) not use them or b) get permission. And always cite the source of the image.
You could get images from stock photo sites (example: ShutterShock) that grant you rights to use them. morgueFile is another source, which offers a free photo archive. Be sure to read the terms.
You can always get your own images. Either download them from your digital camera or phone, or get some screenshots. There’s a free Chrome browser plugin by Google that makes it easy to take screenshots. Screenshots, at least, will provide you with unique images that you can probably use in your WordPress sites. Just be careful and always cite your sources. Get permission from the respective owner when not sure. Always show respect.

Inserting Images Into WordPress Posts or Pages

Using the Add Media within the add/edit post/page screens will give you access to the Media Library.
It will also allow you to upload images that will get auto-resized based on the set thumbnail values for the particular theme that you are working with.
You can set an image as “Featured” or insert it right within the post. When setting as Featured, the theme will have full control over placement and size, and the HTML that gets generated.
When “inserting into a post” you have a little more control. You can certainly decide where the image is placed, and you could choose from some set “classes” to decide on text wrapping, etc.
Step 1) Click the Add Media button.
add media button in wp post
Step 2) Click the Select Files button.
select files to upload screen
Step 3) Locate the image on your computer, and clickOpen.
You can see the progress meter in the image slot itself, plus in the right side in the Attachment Detailswindow.
You can click the Edit Image text link for basic cropping, and image flipping options. You can choose to have the changes applied to all of the thumbnails that were created during the upload process.
Step 4) Give the image a Title, and preferably aCaption, and Alt Text as well, for some potential SEO value. Some themes, but not many, will incorporate the Description value somehow.
Step 5) Pick an alignment (center, left, right) or leave it as None.
Step 6) By default, the thumbnail image that gets inserted will link to the biggest version of itself (the originally uploaded file). That can be changed to link to an attachment page (some argue that will give the best chance at getting the image into Image search results, if it’s worthy of being there). You can also have a link to a custom URL, or nowhere at all.
Step 7) Finally, choose one of the pre-built sizes. Most often there will be a small square, and a couple sizes that are within aspect ratio of the original, and also a Full Size option. Medium is usually the default.
When using screenshots for tutorials such as this, Full Size should be used so there is no distortion.
media attachment display settings screen
Step 8) Click the Insert into post button.
You will be presented with code similar to the following:
wp-image-embedding-shortcode-example
The id’s and classes may be defined by the theme which will dictate how the image will ultimately look within the blog post (or page) on the site.
Some unique classes will be displayed specific to the image. They will include the image id number, 57 in the example above, which allows you to give the particular image a custom style that will not be used on other images.

Adding Featured Images Into WordPress Posts or Pages

When adding a featured image, no HTML code will actually show up in the posts/pages content area. The theme will “check for” a featured image when the post is being shown and display it according to the theme’s style.
Step 1) Near the bottom of the right sidebar of the post/page add/edit screens you will see theFeatured Image box. Click the Set featured image text link.
featured-image-example
Step 2) You will be presented with the Media Libraryby default where you can select an image and click the Set featured image button.
You can also click Upload Files near the top if the image isn’t already in the library.
You can then follow the Upload steps from above, minus the “Attachment Display Settings” instructions. Then click the Set featured image button.
featured-image-setting-example

Uploading Other Media Files to WP

You could upload other media files like videos and audio to be included within your posts, using the Media Library functions described above.
It is often recommended however, in many cases, to have the audio and video hosted elsewhere and just embedded into your site. WordPress plugins like WP video lightbox can help you with that.
This saves on bandwidth and storage space, plus also allows you to take advantage of the in-built traffic, and the search engine love, that these media sharing sites have to offer.
YouTube and Vimeo are the top choices for video. And SoundCloud is the rising star for audio. As for images, some people will do a similar thing and upload to Flickr or Pinterest for example, then embed the content into their site.
I sometimes do that for general interest type of images (food for example), that have value on their own. Screenshots, in most cases, somehow don’t qualify.
About the Author: This post was written by Keith Lock who is an author of Tips and Tricks HQ.

Leveraging Content Creation by Repurposing with Value

This is a follow up article for the how do I start a blog and make money online series that we have been publishing on this site to help users get started and create a successful blog.
Creating content on the Internet is what brings people to your web site, your affiliate ad, your sales funnels, or whatever it is you want to achieve. Content is generally the start of that process.
Many marketers have figured out ways to re-purpose their content and convert one piece of content into different multimedia types, each one having stand alone value in and of itself. Certainly you can find re-purposed content across the web that has no extra, and sometimes even lesser, value than the original, as is the case with spun content, or auto-transcription in a lot of cases, but that’s not what I’m talking about here.
In this article I’d like to discuss leveraging written content, let’s start with a blog post, and then converting that content into different multimedia types, first a simple PDF with free tools, then a video, then audio. You can spread the content across the web on the appropriate sharing sites for the given media type, and optionally embed them into your original blog content giving your audience more options to take in your message.

Write a blog post first

Starting with a blog post isn’t necessary, it’s just the approach I want to take here. Bloggers often write about topics from the tops of their heads and lots of words can be put to text in a short amount of time when done that way.
As you know, for a blog post you write the body, between 300 and 1500+ words is common, and the title. You can also include tags, some say to use very short words as tags, others use several long tail keywords. I have seen some high ranking posts that use long tails for tags. To me, it seems spammy and in general the tag will just link to an archive page with one page, but it is effective, so I will leave the decision how to handle tags to you.
Creating a lot of white space throughout the content, rather than just a sea of text looks more appealing to the would-be reader. Embedding images and other media throughout, as well as adding ordered and unordered lists, makes the content even more attractive to the reader. Using headlines, usually with H3 or H2 tags, and including long tail key-phrases that you pull from Google Suggest might not be a bad idea. Also floating your images left or right, or using large images the full width of the content area make for an attractive post.

Convert to PDF for free

A great strategy is to convert the post to a PDF, and then share the PDF on one or more PDF sharing sites. The bulk of the work is done, it just requires copying and pasting the content and exporting to PDF, then publishing. However, I would put a little more into it than that to create value.
First off, for getting a free tool to convert to PDF people often just search Google for “free software to create PDF” or something similar. A lot of times what they end up with is a lite version of software that will not retain hyperlinks and often times will be stamped with the product name or site. That may be fine in some cases but there is a better way. Download the free open source tool from OpenOffice.org. Launch the “Write” program and paste your content in there.
Adding intros, images, copyrights, and calls to action and perhaps an ad or two won’t hurt. You can’t do much with multimedia but that’s OK. You can make it attractive with fonts and pictures. You can set some meta data in the properties then just click File then Export as PDF and you’re done.
When publishing I would take care to create a unique 150+ (even up to 300 or 500) word description for each site you’re publishing to. Include a link to your site in the profile and perhaps to the URL of the blog post if there is an option to do so. PDF sharing sites include Scribd.com, Slideshare.net, DocStoc.com. There are a few others, just Google “PDF sharing sites” to find a list.

Creating a video

There are a few different ways to skin this cat. You can first create a presentation with points from your original post as the slides. This presentation can be shared as its own media as well on sites like SlideShare.net. Then you can create a free screencast using Screenr.com, providing you can get through the presentation in the 5 minutes that is allotted to free users. You can then download the video to be used on YouTube and optionally other video sharing sites.
Be sure to do a quick intro, and an outro with a call to action. Now, if doing the presentation (you can use free software from OpenOffice.org for this as well by the way, the presentation software is called Impress) seems more work than you would like to do, simply flipping on the web cam and reading the post into an attached mic in a conversational way is fine as well. There are ways to put your face in a smaller window and still have control over the screen that is being captured. Or you can just do a screen capture video demonstrating what is discussed in the post. This obviously works best for “how-to” type posts.
I think YouTube is an obvious choice for uploading the video to, but there are certainly a lot more options out there for video sharing. Again, I would recommend a unique, longer than average, description used for each site. I realize this is a little more work but if it’s content that originally came from the top of your head it should be rather easy, and is well worth the extra effort. Perhaps you can span this whole process across an entire week and sink real value into each step to really make it worthwhile.
One last thing, for YoutTube, if you include a plain link at the top of the description (with the http) it will turn into a hyperlink. That can be used for your site URL or post URL or both. Multiple links can be included. Something that I noticed some SEO experts doing that I have been experimenting with as well is linking to the YouTube video itself at the bottom of the video description.
They were just dropping the link in, I decided to use it with a call to action by saying something like — if you liked this video you can embed it into your site using the embed code below in the “share” section, or else link to it directly using this link — then I paste the YouTube video URL immediately after, which it then hyperlinks back to itself after publishing. I don’t know the value that really serves for users so use with caution.

Extracting audio from the video for a podcast

Now, the simplest way to get audio from this is by simply extracting the audio track from the video. Be sure that when creating the video you keep in mind that it will also be used for your podcast so it might be wise not to say “in this video…” or anything similar. You can extract sound from your video using free software called Audacity.
There’s not a great deal to say about creating the audio except that when publishing it, keep the same ideas in mind about writing a unique description. Also sharing it on multiple audio-sharing or podcast sites might be a good idea. Sharing podcasts is different in that you generally just share a podcast feed rather than upload the individual file everywhere. You start with one source, either your own blog, or a hosted site and get the podcast-friendly (and perhaps iTunes friendly) feed, and share that. There are free and paid services out there for this. I have no personal recommendations, except that if you intend to upload to just one place, SoundCloud.com is a popular choice amongst marketers and podcasters.

Extending your social reach with images

If you are using your own personal images within your original post, you can upload them to places like Flickr, Instagram, Pinterest and others, and then embed them into the post. Then you can link back to the post in the images description on the social site.

Taking it a day at a time

Now, if you are committed to providing real value, I don’t suggest you try to handle all these steps in just one day, unless you have a team behind you. If going at it alone…
Day 1 - Put your content into the blog post. Go out and capture images and unqiue video perhaps. Break the article or blog post up into sections, sections that can be discussed in a stand alone way. Publish the images and the post. Social share the post (FB, Twitter, G+, etc.)
Day 2 - Create and publish the PDF. Today is an easy day, but it may encourage you to get creative with the descriptions and to share on multiple sites. Social share. Embed in original post if desired.
Day 3 - Create the video and publish it, and/or publish any video captured on the first day. Spend time on decriptions. Share on multiple sites. Social share. Embed in original post if desired.
Day 4 - Extract the audio, publish and share it.

Tying it all together with article marketing

Day 5 - Take one of the concepts or sections from the original post and write a quick 500 word unique article about just that. Link to the post, the images, the videos, and/or the audio (or even embed some) and publish it to a high authority, high Alexa, or niche site or blog.
Check Alexa to see the top sites and find out how you can publish on them. Learn the publishing rules and always provide the same value as if publishing to your own site.
Now, take the weekend off, or perform the steps from Day 5 again. If you find that the main post becomes popular, highly shared, highly commented on, etc. consider setting up auto-tweets of the URL and short description at set intervals to keep giving the post social juice as you move onto the next killer content to share with your audience.

Tips to Increase Creativity and Productivity for Online Success

The Internet and the way people do business and communicate with each other has immensely shattered the traditional notions of employment and how information and knowledge is disseminated, shared and absorbed.

Not much more than 10 years ago it was a universally accepted truth for most people that if you wanted to get anywhere in life you would need to get some sort of education and then find a nice job (preferably close to home with a relatively easy commute).
Alternatively those who were a bit more ambitious and courageous sought to build offline businesses in which they were masters of their own destinies even if this form of living does usually involve a huge financial risk and perpetually long hours.
All of the above situations are perfectly OK and are still a legitimate way to make a living, but the point is that now, like never before, there is another dimension in the form of the Internet which just about everyone has access to and from which people can pursue businesses or some means of income generation which simply was not possible a few decades ago.
And this leaves us with a nice segue to the point we want to make – you now have options available to you which are only limited by your imagination, creativity and willingness to have a go.
So it would seem that if you could only come up with some good creative ideas, there’s no telling where you can take them when you apply them on the Internet. This is very true and what people should realize is that you don’t have to come up with the best thing since sliced bread in order to make some inroads on the Internet.
Hence the motivation for this article is to point out some elementary things you can do to get yourself in the correct frame of mind to be more creative, driven and productive because these are really the things which will determine whether you will succeed or not (online or offline).
Because unlike the way it was for our parents and grandparents, succeeding on the Internet doesn’t require permission from your boss or hundreds of thousands of dollars or an Ivy League diploma hanging from your wall. Essentially it is all up to you and whether you’re willing to become a little creative, innovative and driven.
So below we have listed some points and tips which will hopefully help you attain the right attitude and spark some enthusiasm and give you a starting point on how to increase your creativity so you can have the confidence to pursue your online goals.

Don’t make excuses – plan on doing something and then do it!

This is the fundamental attitude which seems to be a common trait which runs through most successful people. The financial and other obstacles you may have faced in the traditional sense have now evaporated because of the opportunities the Internet has manifested for all of us and thus there is really no more reason to hide behind excuses such as “I can’t afford to open a business” or “University educations is way too expensive”…. etc.
So get yourself in the mode of setting a goal and then doing whatever it takes to make it happen.

Creativity can be learned and is not necessarily a god-given talent

A famous comedian, writer and actor called John Cleese once explained how he would spend hours trying to come up with an original idea and he almost always succeeded.
He said that this was because the way he did thingsand not some genetic creative prowess which enabled him to come up with creative ideas.
He actually defines a handful of ingredients which help him become more creative:
1) Time and space: you need to give yourself both time and some space where you can be free of the stresses and demands of other things in your life in order to do your learning, investigating, problem solving etc
Your mind needs sufficient time to digest things you may have just learned so it can have the opportunity to come up with new ideas.
Also having a space where you can work which is quiet and conducive to learning and productivity helps greatly.
2) Have the confidence to try things: Eliminating your fears of making mistakes makes it much easier for your mind to become more free to indulge in creative thought.
After all, as stated previously, you’re usually not risking millions when you try out some business idea on the web. (there are of course always exceptions but in general this is case)
3) Be less serious and have a sense of humor: This point is not surprising considering John Cleese is a comedian, but it should apply to all of us anyway. Being serious about things all the time allows fear to creep in and we lose confidence to try new things.

Be engaged in what you are doing

When you’re learning new things or trying out ideas you should be totally engaged in the task at hand and not thinking about unrelated matters or distractions.
This should actually apply to everything you do – even washing the dishes or cleaning up around the house.
When we are fully immersed in what we are doing we tend to persist more at solving problems and become more likely to find solutions.
Even when we aren’t necessarily trying to solve anything, by being fully engaged when performing a task results in better outcomes and higher quality of work.
Buddhist monks call this mindfulness but you don’t have to be a monk to get the benefits. Psychologists have also done studies which show that the concept of “flow” or being “in the flow” is more likely to occur when we are mindfully engaged in our task.

Attain some new skills to open creative opportunities

We’ve already mentioned how the Internet has completely changed the way people learn and do things.
For a couple of hundred dollars a year you can actually teach yourself new skills which you can turn into a valuable asset in the comfort of your own home and at your own pace.
Educational institutions are quickly becoming redundant because of the Internet revolution and the sky’s the limit for all of us.
Acquiring a new skill often opens up different opportunities and gives you a new way of looking at something.
There are now many quality online- learning websites where you can learn anything you want for a fraction of the cost of an equivalent course you might get at a traditional learning institution.

7 Underutilized and Hidden WordPress Features

WordPress has grown from a simple blogging tool to a powerful CMS platform over the years, with many webmasters using it to run their personal and business sites, as well as online stores. Despite this expansion in the platform’s functionality, many users still skim the surface and utilize only the basic features that are prominently placed on their admin panels. If you want to take full advantage of everything the CMS has to offer, read on for the list of underused WordPress features, the functionality behind them and the reason people often forget they are there.

1. Featured Image

Many WordPress themes incorporate Featured Image into their designs, but if yours doesn’t, you can still take advantage of this convenient option. One of the reasons not everyone is using it is because the feature was added with the later versions of WordPress, starting with 2.9 release, so old-timers might not be used to it being part of their usual WP toolkit, while others simply don’t fully understand its designation. Initially called Post Thumbnails, the feature helps you significantly improve the visual presence of your site. It automates a lot of the process of adding images, doing most of the work for you, like cropping and resizing.
Featured Image comes handy when you want to display a picture associated with a certain blog post on your home page. You don’t have to resize the picture to create a thumbnail or place it on the page manually every time you want to do so, because Feature Image will perform this task for you. It will also let you easily create thumbnails to be placed on various social media sites like Facebook. It gives you more control over how the image from your site is displayed in the social media.
Keep in mind that any older themes designed for WordPress versions before 2.9 are not compatible with this feature. If your theme does support it, you’ll be able to use it to upload an image via the standard WP uploader. Once this is done, click the Set Featured Image link. A preview will appear, after which you can confirm placing the image into the post. WordPress will then resize and crop your image as needed, and place it everywhere it should be featured on the site.

2. Screen Options

Many people are happy with whatever functions are readily available to them in WordPress editor, but the fact is that there are many others hidden under the Screen Options tab in the top right-hand corner of different sections. Some of the options available under this tab include Excerpt, allowing you to create excerpts of your posts, Author for changing the post’s author if your site has several contributors, and Slug for editing the URL of your post, including the desired keywords and making it more SEO friendly. You can also use the Discussion feature to update your preferences for pingbacks, trackbacks and comments. Here you can uncheck the Allow Comments box to disable comments for any particular post. Several other useful options are made possible with the help of this underutilized WordPress feature.
wordpress screen options menu

3. Scheduled Posts

You might have an opening in your schedule allowing you to complete several articles in a span of a single week or day, after which you are starting a busy streak with no time to publish articles at all. Those of you familiar with the workings of the blogging world know that this can be a major issue. After all, your blog’s success largely depends on posting regularly, proving your site to be an active, current information source, and ensuring your audience’s loyalty. WordPress post scheduling capability addresses this particular issue, allowing you to write several articles at once and schedule for them to get posted at different times.
Many bloggers ignore this feature, as they believe they can just as easily write drafts and publish the posts manually at whatever time they choose to later on. The truth is, though, that you can easily forget to publish as planned, plus doing it manually takes up your valuable time, which you could spend on writing more posts or promoting your blog. Things get even worse if you write a bunch of posts before going on a vacation. You might think that you’ll log in daily to make a new post, but will you really want to take time away from your deserved rest to do such trivial tasks?
In order to schedule a post for later, simply click the Edit link next to the Publish Immediately option, which is located in the Publish section to the right of your post draft. Select the time and date when you want the post to go live and click OK. The Publish button will now read as Schedule. Click it to activate your scheduled settings. You can always update the timing by clicking the Edit link once again.

4. Sticky Posts

If some of your posts are more popular than others, and especially if these popular posts help drive a lot of traffic to your blog, you’ll want to take advantage of the Sticky feature offered by WordPress. To use it, click the Edit link next to the Visibility option of your post’s Publish section. Check the box that reads “Stick this post to the front page,” and depending on your theme’s layout, this will display the post in the designated part of your front page. This option is underutilized mainly because a lot of WordPress users simply don’t know about its existence.

5. More Tag

You have probably seen a lot of blogs that have an excerpt to each post on the home page, with a Continue Reading or Read More link on the bottom of each one, taking the visitor to the page with a full post. As convenient as this feature is, it is still highly underused by many bloggers who either don’t know how to use it or simply don’t know about its existence. A More tag can be used to easily split up posts in WordPress. In your visual editor, you can simply click the Insert More Tag button after you write your excerpt, splitting the article at that point. Everything you write after the More… line will be displayed on a new page, once the user clicks the Continue Reading link. If you are using HTML mode of your WP editor, you can achieve this by simply placing a more tag like the following to add the same feature.
<!--more-->

6. Next Page Tag

The next page tag can be really handy when writing an in-depth tutorial. This allows you to break the tutorial/article/post into multiple pages that will make it more readable for users.
You simply add the following next page tag (in the “Text” mode of the editor) where you want to break the content and WordPress will take care of the rest:
<!--nextpage-->
The following screenshot shows how to use this tag:
wordpress next page tag usage

7. Limit the Number of Post Revisions

WordPress keeps past changes of any post using the post revisions feature. This is a great feature but if you have a lot of posts then it can also take up a lot of space in your database if it continuously grows.
You can completely turn the post revisions feature off but I recommend you keep that feature ON but limit the number of post revisions to keep (that way it doesn’t grow indefinitely).
Simply paste the following line of code in your “wp-config.php” file to limit the number of post revisions:
define('WP_POST_REVISIONS', 3);//You can use any number
Do you know of an underutilized WordPress feature that I haven’t listed here?

Start Podcasting on Your WordPress Blog in 7 Easy Steps

Running a podcast on your blog can be a great way to gain additional traffic, re-purpose your existing content and even make some money through audio ads. And while the popularity of podcasting was on the decline a few years ago, this activity has regained a lot of momentum recently and is now successfully used by a lot of popular bloggers. There are several things you’ll need to do if you are planning to start posting podcasts through your WordPress blog. Here is a simple step-by-step guide that will help you get started.

1. Install Recording Software

To start with, you will need a good mic and audio recording software to be able to record your podcast and make minor edits to it. Audacity is the most popular free program among podcasters, providing the ability to cut and splice files, reduce noise, add silence, and add background music or intros.
If you want some extra features, you can opt for a paid program like Garageband for Mac, or Reaper for either Mac or PC. Audacity should have all you need on the beginning, though, except for the ability to save your audio files in MP3 format. You can add this function by installing the open-source LAME MP3 encoder.

2. Choose a Host for Your MP3 Files

For uploading your podcasts, you will need an affordable host with sufficient amount of space allocated for your MP3 files. You can start by using the same server where your blog is located, but as more people start downloading your podcasts, your loading times might slow down significantly. Choosing a hosting service specifically for your podcasts is a good idea, and even if you don’t get one right away, you’ll have to switch sooner or later. Libsyn is a popular service for this, offering plans from $5 for 50 MB of storage and up to $75 for 1.5 GB, with plenty of options in between. Blubrry is another media hosting provider, with plans from $12 for 100 MB and $80 for 1 GB. Besides podcast hosting, the latter provides a number of other services for media creators, including statistics, podcast ads, consulting and more.
Amazon S3 storage service uses tier pricing and is another option that’s worth checking out (it is very cheap). And if you are trying to save on hosting, you can always upload up to 15 GB to Google Drive free of charge.

3. Add a Podcast Category to Your Blog

Once you have at least one podcast recorded and uploaded, you should add a category called Podcasts to your blog. You can do this in the Categories section under Posts, or via the right-hand Categories menu in the New Post form. By creating a new category, you are also starting a separate RSS feed for podcasts. Your feed link for podcasts will read as http://yourURL/category/podcast/feed. Now whenever you create a new audio post, be sure to assign it to the Podcasts category.

4. Get a Player Plugin

In order to make your podcast more presentable and let your listeners pause, rewind or fast forward your episodes, you should add an audio player plugin. Look for one with different skin and color options, so you can find a style that best suits your blog’s design. Some of the most popular plugins are Audio Player, Blubrry PowerPress and Compact WP Audio Player.
PowerPress, for example, gives you several styles to choose from and allows you to further adjust the look of the player by changing its dimensions, as well as the color of every element. You can do further customization by changing button, volume and slider settings – pretty much everything you need to make your player truly unique.

5. Create Your First Podcast Post

Your next step will involve creating a regular WordPress post, writing a headline and adding whatever description you want to go with your podcast. You will then want to include a download link from wherever your audio is hosted, which is the information iTunes will use to add your podcast to its listings.
The second item you should add to your podcast post is the player you have installed in the previous step. This way your visitors can listen to the podcast without leaving your blog, as not all of them will want to download it to their devices. Follow the instructions on adding the player to your posts, which are usually provided with the plugins. In most cases, all you’ll need to do is add a simple shortcode to complete this action.

6. Set up Your RSS Feed

While WordPress has a built-in Feeds feature, it provides only the basics and lacks some of the advanced functionality. For this reason, most bloggers prefer setting up their RSS through a Google service called FeedBurner. You can get a quick RSS link by using the “Burn a feed right this instant” feature and checking the box that says “I am a podcaster.” The service will let you name your feed, after which you should click on Smartcast to fill out such information as summaries, subtitles, categories and a link to an image to be associated with your podcast. Some people say though that FeedBurner is quickly (or perhaps) slowly falling by the wayside so do this at your own discretion.

7. Add Your Podcast to the iTunes Store

To get your podcast listed on iTunes, you’ll first need to download the program and create an Apple ID, if you haven’t done so yet. Once iTunes is installed, go to the following URL to open the podcast submission page
https://phobos.apple.com/WebObjects/MZFinance.woa/wa/publishPodcast
You can then follow the simple instructions to submit your podcast. iTunes will automatically pull the image and any other information it needs from FeedBurner. You will get an email notification if your submission has been approved. As long as your podcast doesn’t violate any copyright laws, you should have no problem with this.

Can You Make Money from Affiliate Marketing? If so How?

This is a follow up article for the “How do I Start a Blog and Make Money Online” series that we have been publishing on this blog to help the newbie’s get started with a blog.
Before I start, I would like to make one thing clear:
I do not believe in easy money and there are no magical tips in this article that will help you get rich overnight. So if you are after easy money then this article is not for you.
This article mainly covers the following topics:
  • What affiliate marketing is and the different types of affiliate marketing
  • The advantages of being an affiliate marketer
  • Some tips and good practices to become a successful affiliate marketer
So, can you really make money from affiliate programs? Well yes and no; there is money in affiliate marketing but if YOU can make money from it or not depends on a lot of other factors such as your commitment, experience, site traffic etc.

What is Affiliate Marketing?

According to Wikipedia
“Affiliate marketing is a marketing practice in which a business rewards one or more affiliates for each visitor or customer brought about by the affiliate’s marketing efforts”
Basically, you as a publisher will be rewarded when you help a business by promoting their products or services. So for example, if you sign up for Tips and Ticks HQ’s affiliate program and promote it’sproducts then you will get a commission when the visitor you send from your site makes a purchase.
Affiliate marketing is probably one of the quickest and cheapest (not the easiest) ways to start making money online as you don’t have to create any products yourself. You simply link up a buyer and a seller, and you take a commission on the sale that has been referred by you.

How Does Affiliate Marketing Work?

When you join an Affiliate program and choose the products that you want to sell, sellers provide you with a unique affiliate code that you can use to refer traffic to the target site. Most affiliate programs will offer ready made text links, banners and other forms of creative copies whereby you only have to copy the code and place it on your website to start referring traffic. When interested visitors click on these links from your site they get redirected to the product site and if they purchase a product or subscribe to a service you as the referrer make a commission.
The sellers can track your performance through your affiliate ID and the affiliate softwares (eg. WP Affiliate Platform) that they use. You also have complete, real time access to all sales and commissions stats.
You don’t need to sell products all the time to make a commission. Different affiliate programs can use different payment terms such as:
  • Pay per Sale: In this program a merchant pays you a percentage of the sale price when the purchase is completed.
  • Pay per Click: In this program you get paid based on the number of visitors you redirect to the Merchant’s website from your affiliate site, whether or not a sale is made.
  • Pay per Lead: You get paid once the referred visitors provide their contact information on the target site by filling out a simple contact form.

Why be an Affiliate Marketer?

Affiliate marketing is considered to be one of the world’s fastest growing and best internet marketing techniques to earn money online and I will explain why:
  • Cost effective: Marketing on the internet is cheap and you don’t have to worry about the production cost as the product is already developed by the seller. You don’t need a physical business location or hire employees either.
  • Global Market: Online marketing gives you the opportunity to reach people all over the world easily.
  • No Fees: You don’t need to pay anything to join affiliate programs.
  • No Storage No Shipping: You don’t need to worry about storage, packing or shipment of the product. They are all taken care of by the seller.
  • No customer support: You don’t need to provide any customer support or deal with consumer complaints as the Seller does that for you.
  • Passive income: A regular job can give you a fixed income as long as you continue to work. Depending on your marketing skill Affiliate marketing can create a steady flow of income even when you are not in front of your computer.
  • Work from home: If you make enough money then you don’t have to worry about going to work at the same time every day or getting stuck in traffic. You can work in the comfort of your own home.

Tips on Becoming a Successful Affiliate Marketer

After reading all the benefits of affiliate marketing if you think you will be rich over night by selling affiliate products online then you are wrong. Affiliate marketing is definitely an excellent way to make money online but it’s highly competitive too. In order to be successful in Affiliate marketing you need to know the market needs, learn how to promote products, what works and what doesn’t. The following are a few tricks on becoming successful in affiliate marketing that I have learnt over time.

1. Only Choose a Handful of Good Products

The first mistake a lot of affiliate marketers make is that they register with too many different affiliate programs and try to promote everything. Pursuing affiliate marketing down this path can become very overwhelming and you won’t be able to promote any product properly. All you need in order to be successful is a handful of good products to promote. Try to understand the market needs and look for products that align correctly with the topic of your site.

2. Use Several Traffic Sources to Promote Products

Most affiliate marketers put up the ads only on their sites. There is nothing wrong with this approach but know that there are many other traffic sources that you can tap into and promote the products simultaneously. The more targeted traffic you can send to the sales page the more your chances are of making money.
Google Adwords can be used to drive targeted traffic to a sales page. You simply make an ad in your adwords account then use your affiliate link in the target page URL of the ad. Obviously, you will have to continuously measure the conversions and see if the campaign cost is less than the campaign profit in order to keep the campaign running but I am sure you get the idea.

3. Test, Measure and Track Your Affiliate Campaign

It is a very good idea to use different product promotion strategies so you can figure out what is working and what is not. Try to do split testing and measure the performance of each campaign then take actions accordingly. Changing a few things here and there can increase your profit dramatically. Make sure to place the banner ads on different areas of your site’s pages. Some positions will make the ads more noticeable than others.
Most affiliate programs will give you basic stats that you may need but there is nothing stopping you from using your own conversion tracking software too. There are many conversions tracking sofware out there that you can use to track your affiliate campaign.

4. Research the Demand of the Product

If you try to sell a product that is in low demand then chances are that you are not going to get many sales no matter how hard you try. So it is a good idea to spend a bit of time researching and finding out if a product that you are thinking of promoting is a product that your audience needs. If your site gets decent traffic then you can conduct an online survey and easily get input from your visitors.

5. Stay Current with New Methods and Techniques

Affiliate marketing is a very competitive field and people are always coming up with new techniques. Try to stay current with these new techniques and market trends otherwise you will fall behind.

6. Choose the Right Merchant

When you promote a product you also promote the person or the company who is behind the product so try to choose wisely. You don’t want your visitors to go and buy a product following your advice then come back unhappy. Do you think that this visitor will come back to your site and take your advice again? Most likely no; this can hurt your credibility in the long run. Usually, websites/company that offer good customer service will have better customer satisfaction so try to stick with promoting their products.

7. Use Helpful Tools

If you are serious about affiliate marketing then try to find tools that will help you be more efficient. There are many helpful tools out there. If you are using a WordPress powered site then consider getting a plugin similar to the Affiliate Link Manager.
Don’t just hope and pray that visitors will buy; setup everything correctly and make it happen! If you think that visitors will click on your affiliate links and buy just because you placed dozens of affiliate links on your website then you are wrong! You need to have a structured plan in place. Affiliate marketing is a business so you will have a much better chance of succeeding if you treat it like one.
I am sure I haven’t covered everything so please feel free to share your tips in the comment area below.
The affiliate marketing FAQ is also a good read for you.